As a long time Vim and Neovim user, I’ve gone through many different iteration of configuration and plugins over the years. This post serves a relatively small demonstration of my Neovim configuration. The configuration is largely written in Lua and leverages many plugins. My configuration files can be found on GitHub
The demonstration is focused on the plugins used for development and writing this blog. Here are some of the key areas the plugins provide functionality in:
- Syntax Highlighting
- Language Servers
- Completions and Snippets
- Buffer and Project Navigation
- Search
- Display and Diagnostics
- Git
- Embedded Terminals
- Theme
- Writing
Plugins
My package manager of choice is Packer. Here are my currently installed plugins:
                packer.nvim - Total plugins: 41
 ━━━━━━━━━━━━━━━━━━━━━━━━━━━━━━━━━━━━━━━━━━━━━━━━━━━━━━━━━━━━━━━
 • Comment.nvim
 • LuaSnip
 • barbar.nvim
 • cmp-buffer
 • cmp-cmdline
 • cmp-git
 • cmp-nvim-lsp
 • cmp-nvim-lsp-signature-help
 • cmp-nvim-lua
 • cmp-path
 • cmp_luasnip
 • dashboard-nvim
 • diffview.nvim
 • gitsigns.nvim
 • glow.nvim
 • gruvbox-material
 • leap.nvim
 • lsp_lines.nvim
 • lualine.nvim
 • nvim-autopairs
 • nvim-cmp
 • nvim-hlslens
 • nvim-lspconfig
 • nvim-neoclip.lua
 • nvim-scrollbar
 • nvim-surround
 • nvim-tree.lua
 • nvim-treesitter
 • nvim-treesitter-textobjects
 • nvim-ts-rainbow
 • nvim-web-devicons
 • packer.nvim
 • plenary.nvim
 • sqlite.lua
 • telescope.nvim
 • toggleterm.nvim
 • trouble.nvim
 • vim-interestingwords
 • vim-sensible
 • vim-snippets
 • zen-mode.nvim
The majority of the Lua configuration for these plugins can be found in lua/user/plugins.lua.
Favorite Features
Lets dive into a high level overview of favorite features. This is not an exhaustive description of every plugin but simply some of the plugins that are significant to me. The order of presented features is arbitrary.
Auto-Completion
I’ve avoided going into detail about language servers, lsp client, auto-completions, and snippets because that is a large topic on its own. It is worth noting that I am using nvim-cmp, cmp-nvim-lsp, nvim-lspconfig, LuaSnip, and various language servers as a completion engine for programming and general Neovim usage.
Navigating the File System with nvim-tree
nvim-tree - A File Explorer For Neovim Written In Lua
Navigating files with a GUI is a relatively infrequent activity as there are better methods for navigating between known files. However, there are time I wish to browse and explore through a directory structure or perform actions that nvim-tree make convenient and quick.
I map nvim-tree to <Leader>y to quickly toggle it open and closed.
Finding Anything with Telescope
Telescope - telescope.nvim is a highly extendable fuzzy finder over lists.
Much could be said about Telescope but I’ll leave that to its GitHub page and documentation. Fundamentally, Telescope features pickers, sorters, and previewers in a clean floating window UI. It can be used for fuzzy searching many different sources. For example, a few sources I use it for are as follows:
- searching recent files
- searching files under the current working directory
- searching for text in files under the current working directory
- searching
:helpdocs - searching project symbols and references
- searching commands and mappings
- searching text in current buffer (alternative to
/search) - displaying spelling suggestions for misspelled words
- selecting and embedding images into a blog post’s markdown
- and more…
As you can see, Telescope does more than simply “search”. You can perform complex options from a picker list. It’s easy to customize and extend for you specific needs. On top of all that, it looks nice if you ask me.
Visit the official showcase to see Telescope in action!
Blog Image Embedding with Telescope
I customized the default find_files picker to quickly preview and embed images into a blog post. The picker will
search a directory corresponding to the post for images and uses a terminal preview to show the image. When you select
an image file, the markdown will be inserted at your cursors location for you.
Using this post as an example, there is an animated .gif in the post’s content directory. Notice how even an animated
.gif can be previewed?
You may have noticed the preview is pixelated. That is because Windows Terminal does not currently support the Sixel image encoding. Once Sixel is supported, the preview will be source quality.
The image picker is shown by executing a command mapped to a simple function that customizes the find_files built-in
picker.
function M.blog_pick_img()
local actions = require "telescope.actions"
local action_state = require "telescope.actions.state"
local previewers = require "telescope.previewers"
local post_name, _ = vim.fn.expand('%:t:r')
local post_dir = vim.fn.expand('%:p:h')
local post_content_dir = post_dir .. '/../../static/posts/' .. post_name .. '/'
local opts = {
prompt_title = 'Select Image',
cwd = post_content_dir,
layout_config = {
width = 0.99,
height = 0.99,
horizontal = {
preview_width = 0.8
},
},
attach_mappings = function(prompt_bufnr, _)
actions.select_default:replace(function()
actions.close(prompt_bufnr)
local selection = action_state.get_selected_entry()
local markdown = ''
vim.api.nvim_put({ markdown }, "", false, true)
end)
return true
end,
previewer = previewers.new_termopen_previewer({
title = 'Image Preview (Viu)',
get_command = function(entry, _)
return { 'viu', entry.path }
end
}),
}
require('telescope.builtin').find_files(opts)
end
Toggle Terminal
toggleterm.vim - A neovim plugin to persist and toggle multiple terminals during an editing session
The GitHub Readme provides demonstration animations. Essentially, it’s a convenient plugin for managing persistent terminal buffers. You can keep a terminal buffer in a permanent window or you can close the window but the terminal will keep running. I’m a fan of popping up a floating terminal for a quick terminal session.
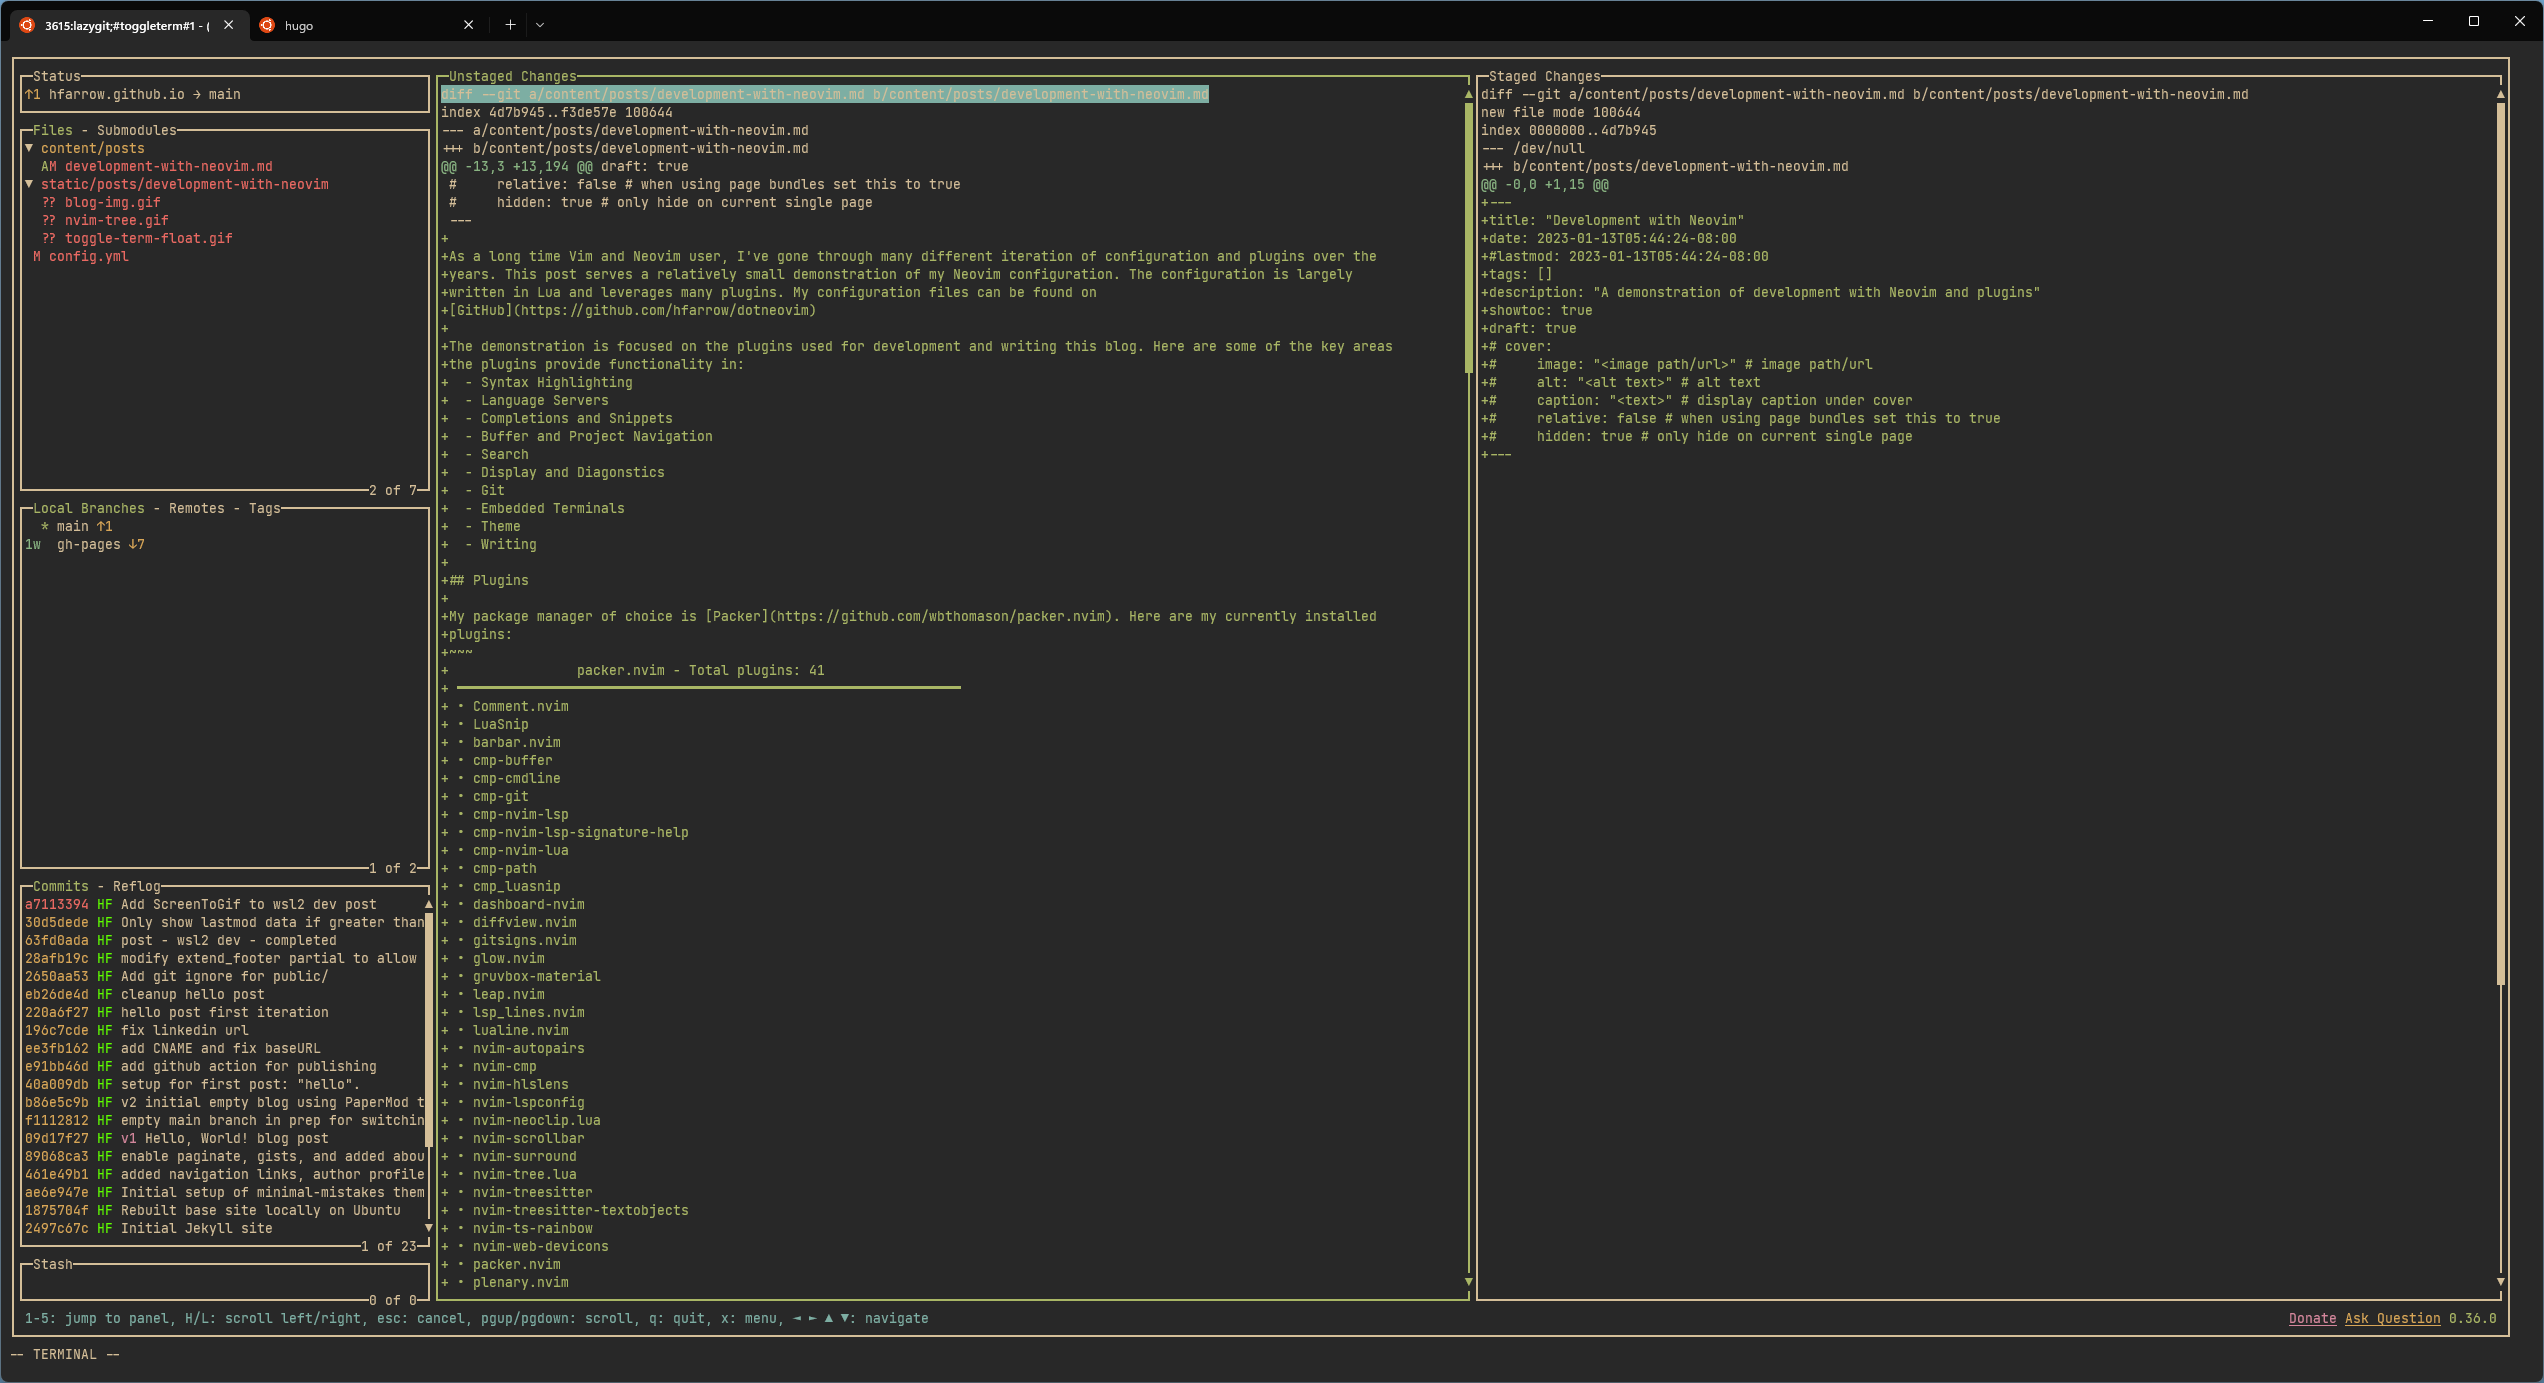
Lazy Git
Lazygit - A simple terminal UI for git commands, written in Go with the gocui library.
Lazygit itself is not a Neovim plugin. However, using ToggleTerm and a small amount of configuration allows me to show it
in a full screen floating terminal window.
The Lua config to show Lazygit in ToggleTerm starts by defining a new terminal object.
local Terminal = require('toggleterm.terminal').Terminal
local lazygit  = Terminal:new({
  cmd = 'lazygit',
  hidden = true,
  direction = 'float',
  on_open = function(_)
    require('user.functions').tunbind('<Esc>', { buffer = true })
  end,
  float_opts = {
    border = 'single',
    winblend = 0,
    width = function()
      return math.ceil(vim.o.columns * 1.0)
    end,
    height = function()
      return math.ceil(vim.o.lines * 1.0)
    end,
    highlights = {
      border = "FloatBorder",
      background = "NormalFloat",
    },
  },
})
Next, a simple function that captures the terminal object and toggles it. The function is mapped to a normal mode binding. When the terminal object is toggled, it will automatically execute the lazygit command.
function _Lazygit_toggle()
  lazygit:toggle()
end

local fn = require('user.functions')
fn.nbind(
  '<leader>lg',
  '<cmd>lua _Lazygit_toggle()<CR>',
  { noremap = true, silent = true }
)
Highlighting Interesting Words
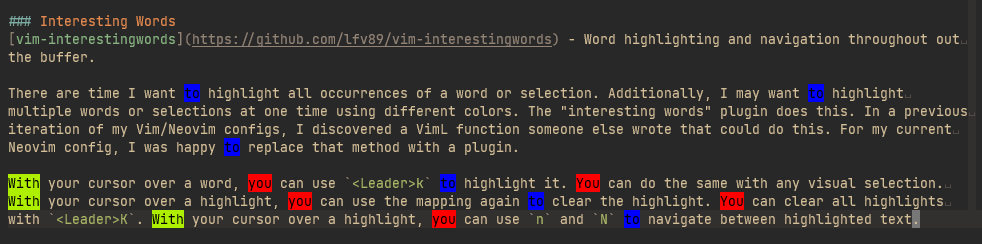
vim-interestingwords - Word highlighting and navigation throughout out the buffer.
There are time I want to highlight all occurrences of a word or selection. Additionally, I may want to highlight multiple words or selections at one time using different colors. The “interesting words” plugin does this. In a previous iteration of my Vim/Neovim configs, I discovered a VimL function someone else wrote that could do this. For my current Neovim config, I was happy to replace that method with a plugin.
With your cursor over a word, you can use <Leader>k to highlight it or clear an existing highlight. You can do the
same with any visual selection. You can clear all highlights with <Leader>K. With your cursor over a highlight, you
can use n and N to navigate between highlighted text.